For those that know me well, I tend to be inspired by recipes, but go off the rails in the execution. In the kitchen, I'm a bit of a rebel ... I like to do my own thing, add my own spin, etc. Inspired by the corn-and-tomato-pie recipe I linked to a couple of weeks ago, I took its essence and flipped it on its head. Instead of a chunky, hearty filling, I made a simple corn custard that was poured over caramelized onions that covered the bottom of a pre-baked tart shell. Then I added some unadorned, but glorious-in-their-own-right, sungold and candy tomatoes to the pool of custard. Baked for 40 minutes, the pie came out of the oven slightly puffed and golden. We ate it at room temperature with super-sweet muskmelon, but it would be great served warm as well. After an afternoon at the pool, it definitely hit the spot.

Corn Custard and Tomato Tart
serves 2 hungry bambini and mom and pop, too

Ingredients:
1 basic pie or tart crust recipe; I used the 9-inch pie crust recipe from Cook's Illustrated
1 large sweet onion, sliced into half moons
1 bunch of fresh thyme
2 tablespoons olive oil
2 ears sweet corn,
1/4 cup whole milk or heavy cream
1/2 cup creme fraiche
2 egg yolks
1 teaspoon kosher salt
ground black pepper to taste
1/2 pint assorted cherry/grape tomatoes -- I used sungold and baby candy, but feel free to use any grape or cherry tomatoes you have!

Directions
Pre-bake the tart shell according to your recipe. Set aside to cool.
Adjust the heat of your oven to 375 degrees.

In a large saute pan over medium-low heat, heat the olive oil and thyme until fragrant. Add the onions, with a large pinch of salt and some freshly ground black pepper and cook low and slow until the onions are caramelized and sweet -- about 20-30 minutes. Set aside to cool.

While the onions are cooking, make the corn custard. Cut the kernels from the cob and place ikernels in a blender with the 1/4 cup milk or cream. Puree until smooth. Pour the puree through a fine mesh sieve or chinois. To the strained puree, whisk the creme fraiche, egg yolks, salt and pepper until incorporated. Taste and adjust seasonings as needed.

Layer the cool onions on the bottom of the tart shell. Pour the custard over the onions (don't pour the custard to the rim of the tart; leave about a 1/4 gap). Nestle the tomatoes in the custard and carefully transfer the tart to the oven (I place on a baking sheet first). Bake for 40 minutes, until golden and puffed adn the custard to set, but still wobbly.

Cool until warm or leave at room temperature.

Happy eating, -s.
tomato caprese salad with sherry vinegar and olive oil

Hello, September! You're looking good.

With Rhys starting kindergarten and James starting preschool, it's been a busy, emotional week. Comfort food has been in order: I slow-cooked a pork shoulder in salsa verde on Tuesday for tacos and later for Cuban sandwiches. Sweet corn got sauteed with basil, red onion, poblanos and sungold tomatoes (and a healthy dose of heavy cream) for a pasta dish on Thursday. Salmon burgers rounded out the week, highlighted with a smoky paprika mayo and a thick slice of tomato. It may not cure every bump, bruise or blue moment, but food is a powerful curative when you need that little something to ease you through a tough day.

p.s. here's a song to start the weekend. kick your heels up!

p.p.s. to prep for fall cooking, here's a wish-list of cookbooks I want to read and cook from:
 
 
p.p.p.s. Quote of the week:  A good heavy book holds you down. It's an anchor that keeps you from getting up and having another gin and tonic. -Roy Blount, Jr.

p.p.p.p.s for breakfast this weekend, make my "breakfast crisp" - apricots, peaches or blueberries work great and are in season.


peach breakfast crisp ... ready to eat
Breakfast Crisp a.k.a dessert for breakfast
serves many hungry bambini

Ingredients
For crisp topping
6 tablespoons whole-wheat pastry flour
2/3 cup rolled oats
1/3 cup unsweetened, shredded coconut
1/4 cup brown sugar
1/4 cup turbinado sugar (white sugar works too)
1/4 teaspoon cinnamon
1 teaspoon kosher salt
3/4 cup sliced almonds
1 stick of butter, cubed and kept very cold

For fruit
2 lbs ripe fruit - blueberries, raspberries, apricots, peaches, nectarines (peel and cut the stone fruit into 1-inch cubes)
1/4 cup sugar
juice of half of a lemon
zest from whole lemon (I use a microplane)
1 tablespoon for cornstarch

Directions
Preheat oven to 375 degrees.

In the bowl of a food processor, place the first seven ingredients for the crisp. Pulse a few times to incorporate. Add nuts and butter and pulse until the crisp topping starts coming together, with most of the dry ingredients incorporated into the butter. Place in the refrigertator to chill for at least 15 minutes.

While the topping is chilling, prep the fruit. For stone fruit, you will need to blanch the fruit to remove the peel.  Once that is done, remove the stone and cut the fruit into roughly 1-inch pieces - these do not need to be exact. Berried need just a rinse and drain before proceeding.

Once the fruit is prepped, place in a large bowl with the sugar, lemon juice and zest, and cornstarch. Stir until combine and let macerate for at least 5 minutes before pouring into a large glass or ceramic baking dish (I used a 7"x 12" pyrex dish). Top with the crisp topping and bake until golden brown and bubbly, about 30-40 minutes.

Let cool for at least 10 minutes on a rack. Serve with big dollops of Greek yogurt (or ice cream later in the day).

Happy eating, -s.
summer on a plate
I am utterly in love with latkes, but come summer, potatoes get replaced by zucchini. With six, plump beauties waiting their turn in the crisper, I knew what I was making for dinner: zucchini pancakes. As with most recipes from Marc Bittman, I modified things a bit. Using his recipes as a spring board, I changed up a few things, like squeezing the grated zucchini of its moisture, cutting out the minced onion and adding chopped basil to the mixture. Be forewarned, these are delicate little fritters; I used my All-Clad saute pan with success (a.k.a. no sticking), but if you have a non-stick pan, I would use it. I use this small scoop to make bite-size cakes, but feel free to make this bigger too -- just cook them a bit longer to cook off the raw egg. A dollop of chive sour cream adorned each latke. 

Happy eating, -s.

Since it's my sweet Pickle's 5th birthday, here's a little ditty to get your weekend going.

p.s Happy Birthday, Pickle. I love you. You are my sweet, sweet boy and you amaze me everyday with your wit and charm and funny personality. I'm so proud of how you're growing. xoxo.


p.p.s We're heading to Rhys's favorite place for dinner, Pizza Brutta, but you can re-create their pizza margarita at home with this recipe I highlighted a little while ago. Serve it with this family favorite:


Fennel and Apple Slaw ala Pizza Bianca
serves 4 hungry bambini

Ingredients
1 teaspoon white wine or champagne vinegar
1 teaspoon maple syrup
big pinch of kosher salt
freshly ground black pepper
4 tablespoons toasted walnut or hazelnut oil

1 fennel bulb, cored and shave
1 tart, crisp apple, cut into matchsticks 
1/4 cup toasted walnuts or candied walnuts
fennel fronds for garnish

Directions
In a large serving bowl, add the first 4 ingredients. Whisk to combine, then slowly add the oil. Whisk until emulsified. Taste and adjust as needed.

Add the fennel, apple and walnuts; toss to combine. Garnish with the fluffy fennel tops.

Enjoy!


Happy eating, -s.
the wild klein boys
We had a great weekend for it being SO gross outside - the weather was cold, rainy and grey. Fog rolled in and out both days and we spent a lot of time running around our basement playroom. We had some good, head- and booty-shaking dance parties and there may have been some delicious pastries on Sunday morning to offset the dreaded time change.

Dinners were a team effort this weekend, with both Mr. Klein and me tackling the prep. The boys have been playing so nicely together that it actually allows us to collaborate in the kitchen (like the good old days :).

Chris LOVES salads - the heartier the better, so Saturday night we made Parmesan-coated chicken breast paillards with homemade Caesar salad. I went all-out on the dressing (even coddling the eggs, which was a first for me!). I have to say, it was pretty good. Chris said he could have eaten the whole bowl of salad himself and even Rhys ate a good helping of the greens (shocked!). He, of course, had ketchup with the chicken :)

Caesar salad adapted heavily from marc bittman's how to cook everything

Ingredients
1/2 a clove of garlic, chopped roughly
2 anchovy fillets or 2 tbs. anchovy paste
dash of Worcester sauce
2 eggs
2 tablespoons Meyer lemon juice (regular lemons work too)
6 tablespoons olive oil
salt and pepper to taste
1/2 cup finely grated parmigiano reggiano
One head of romaine lettuce, cleaned, dried and torn into pieces

Directions:
Bring a small sauce pan of water to boil; with a pin, poke of broad end of each egg. Drop the egg carefully into the water for 60-90 seconds. Remove and carefully crack the eggs into a blender or tall measuring cup. Add the garlic, lemon juice, anchovies and Worcester sauce. Using an immersion blender (or regular blender), blend the ingredients until smooth. Taste and season with salt and pepper as needed. With blender running, slowly add the olive oil until the dressing thickens and becomes viscous. Taste and adjust seasonings as needed.

Dress the salad, coating evenly with the dressing; add the parmigiano and serve with crispy chicken breast paillards, grilled chicken breasts or croutons.


Here's what we're eating this week ...

Menu: week of 9 March 2013
Saturday: Chicken Parmesan paillards with Caesar salad
Sunday: Split-pea soup with smoked pork shank and Yukon-gold potatoes
Monday: Impossible ham and cheese quiche from Cook's Illustrated
Tuesday: Winter pizza margarita with apple-fennel salad
Wednesday: Eggs poached in tomato sauce with crusty bread
Thursday: Pasta with sauteed Italian sausage, green cabbage and fresh ricotta
Friday: Fish tacos with avocado crema and shaved cabbage

Happy eating, -s.
Since I was too busy eating, here's a photo from Gourmet magazine
Photograph by Romulo Yanes
 
I am so bad at taking photos of the dinners I make. After all that effort, I just want to eat! Last Thursday night was no exception when I hosted book club at my house. Thirteen lovely ladies showed up for dinner and drinks and good times. I cannot tell you how lucky I feel to have such amazing women in my life.

The book was The Dinner. The dinner was black beans and rice with a load of garnishes - roasted sweet potatoes, toasted pumpkin seeds, tomatillo salsa, cilantro, scallions, radishes and avocado. The dining-room table was used as a buffet for all the edible goodies, while my grandma's old dresser was used as the bar. We started with homemade guacamole, pico de gallo and tortilla chips and two big batches of margaritas. For dessert, we had dulce de leche sundaes with roasted coconut flakes (from Trader Joe's; my newest coconut obsession!).

Ever since I found this recipe on Gourmet magazine's website, it's been a mainstay in our house. The boys eat it simply, while the grown-ups can layer on the flavors and heat with the accompaniments.  As the recipe's author, Kemp Minifie, explains, it's her go-to entertaining dish, as it is a complex, vegetarian crowd-pleaser. 

 
Kemp’s Black Beans by Kemp M. Minifie
Makes 8 to 9 cups

Ingredients
1 lb. dried black beans (about 2 1/3 cups), picked over and rinsed (but not soaked)
1 medium onion, finely chopped
3 tablespoons olive oil
8 cups water
1 1/2 teaspoons salt
1/4 cup Sherry (cream or medium-dry)
1 to 2 tablespoons soy sauce
1 to 2 tablespoons balsamic vinegar

Directions
Bring black beans, onion, oil, water (8 cups), and 1/2 teaspoon salt to a boil in a 6- to 8-quart heavy pot, then reduce heat and simmer, covered, until beans are tender, 1 1/2 to 2 hours (depending on age of beans). Thin to desired consistency with additional water. Stir in Sherry and remaining teaspoon salt, then soy sauce and vinegar to taste (start with 1 tablespoon each), and simmer, uncovered, stirring occasionally, 5 minutes.

The beans improve in flavor if cooked at least 8 hours ahead. Chill, uncovered until completely cooled, then covered up to 1 week, or freeze up to 3 months. Beans thicken considerably as they stand, so thin with water when reheating over moderately low heat.
Note: Beans can be cooked in about one third of the time in a 6- to 8-quart pressure cooker. Follow recipe, combining beans with onion, oil, water, and salt in pressure cooker. Seal pressure cooker with lid and cook at high pressure, according to manufacturer’s instructions, until beans are tender, 30 to 45 minutes. Put pressure cooker in sink (do not remove lid) and run cold water over lid until pressure goes down completely.

Accompaniments
I serve the beans with Rick Bayless's classic, baked white rice from his Authentic Mexican cookbook. It's also great with simple, steamed white rice. The garnishes are key to this dish's success: roasted diced sweet potatoes, toasted pumpkin seeds, cubes of avocado tossed with lime juice, tomatillo salsa, lime wedges, chopped white onion, fresh cilantro sprigs, and radishes.
 
And, finally, here's what we're eating this week ...
Menu: week of 3 March 2013
Sunday: Spaghetti Bolognese with sautéed broccoli rabe
Monday: Shredded, slow-cooked chuck roast sandwiches on torta rolls with avocado and a tomato salad
Tuesday: Turkish-style green beans with whole-grain naan
Wednesday: Shredded beef tacos with onion and cilantro; served with an avocado-grapefruit salad
Thursday:  Chickpea and brown-rice casserole with lemon and herbs
Friday: Indian take-out

Happy eating, -s.   
gnocchi with sausage ragù
 
For many reasons, I like to cook something low and slow on Sundays; here's why:
1) I have the time.
2) It fragrances the house with good, comforting smells as it bubbles away on the stove.
3) And, it provides us with lunch or dinner another time during the week.
This Sunday it was my tomato sauce or marinara or "gravy" if you're a Soprano.

Mine is a riff on Mario Batali's basic tomato sauce from his Molto Mario cookbook. What I like about it: it uses thyme as the herbal note, which means that it can easily be used for both Italian and non-Italian dishes (like stewed white beans with herbed bread crumbs or eggs poached in tomato sauce, to name just two), it has grated carrot in it to add some nice root-veg sweetness, and it's easy to make. I always make double-batch; this time I used half for some ricotta-spinach stuffed shells for Sunday dinner while the other half awaits its turn in the fridge.

Classic Tomato Sauce
makes 2 quarts

Ingredients
1 tablespoon butter
2 tablespoons olive oil
1 large onion, chopped
1 carrot, finely grated
4-6 small cloves of garlic minced; or 2 large cloves, minced
4 sprigs of thyme
kosher salt
freshly ground black pepper
2-28 oz. cans of whole tomatoes, blitzed in blender for 5 seconds (each can)
2 cups water

Directions
Heat a 4-quart saucepan over medium heat. Add butter and melt. When foaming subsides, add olive oil and heat for 30 seconds; add onions and thyme sprigs and sauté for about 5 minutes, until just soft and translucent. Add carrot and garlic. Cook for several minutes, stirring regularly, so carrots and garlic do not brown.

Add blitzed tomatoes, 1 teaspoon kosher salt and 10 grinds of black pepper; stir to combine. Carefully rinse blender jar and tomato cans and measure this "tomatoey" water to make 2 cups of water. Add the tomato water to the pot and stir. Bring to a boil and then turn the heat to low; simmer for 1-2 hours, stirring occasionally. The sauce should slowly bubble away on the stove; raise heat slightly to achieve this bubbling. If too high, turn to lowest setting.
 
What we're eating this week: menu for 12 January - 18 January 2013
Saturday: Salmon chowder with corn and potatoes
Sunday:  Stuffed shells with ricotta and spinach with homemade red sauce
Monday: Turkish poached eggs with sage butter; naan
Tuesday: Grilled pear and cheddar cheese sandwiches; mixed greens vinaigrette
Wednesday: roasted carrot and beet salad with cumin-seed vinaigrette; served with hummus and pitas
Thursday: carry-out
Friday: sausage and sweet pepper pizza

happy eating, -s. 

from Martha Stewart
The more I entertain, the more I realize that simple is better. A multi-course spectacle doesn’t really allow anyone to unbutton and relax. Starting with a single rich nosh and some bubbly helps the evening to unfurl gracefully — without eating too much to really enjoy dinner. My go-to hors d’oeuvre is the gougeres, or cheese puff for those who don’t parlez vous francais.
Gougeres starts with the classic pate choux — a paste of flour, water, butter and eggs. This simple mixture is the start for not only gougeres, but éclairs too. Fold nutty gruyere into the batter and you have the foundation for gougeres. From there you can elevate them with some key add-ins: minced chipotle chiles, Serrano ham, sun-dried tomatoes, black olives, etc. Once they hit the hot oven, they do just as their name indicates — they puff and crisp into golden orbs that are fairly addictive — so plan for several batches before dinner for a group of 10 or so.

My go-to recipe is from Martha Stewart – I love that you can make them ahead and reheat right before the party starts.

Happy eating, -s.

I love my husband for many reasons, but one of my favorite things about him is his absolute gusto when it comes to eating the foods he loves. Many years ago, early in our relationship, Chris and I went on a weekend jaunt with my sister, Heather, and brother-in-law, Mike. We ate at a delicious Italian restaurant that served, with its homemade ciabatta, a whole head of roasted garlic. Now, Chris LOVES roasted garlic and proceeded to pretty much eat the entire head himself. And the remainder of the trip, he literally permeated garlic from his pores (so much so that we had to open the car windows when driving home). Now, that is love.

On many pizzas in our house, there is no tomato sauce. Instead, I make a garlic paste that gets smeared on the crust before the cheese and toppings are applied. Over the years, I have been frustrated by inconsistent roasting of garlic; I use the same method (lop the head off, place on heavy-duty foil, pour some olive oil on top, a sprinkle of kosher salt and a wrap it up), same temperature (350-degrees), for the same amount of time (2 hours) and for some heads of garlic, they would be over-roasted, with super caramelized, hard cloves encased in their papery shells or the total opposite — under-roasted and still super "garlicky," with none of the inherent sweetness of perfectly roasted garlic. Not sure why — maybe some were older or younger, moister or drier … I’m still trying to figure it out.

Well, through trial and error (and many ruined heads of garlic), I have a pretty fool-proof recipe. It’s a little unorthodox, but it works. Here’s how:

Take one large head of garlic and separate the cloves, while still retaining their individual paper wrappings. Pack the cloves in a small, oven-proof baking dish (a ramekin, etc.) and add 1 tablespoon of water and one tablespoon of olive oil, a sprinkle of kosher salt and wrap everything up in heavy-duty aluminum foil. Bake at 350 degrees for 1 hour and 45 minutes to 2 hours.

The combination of the steamy water and oil softens the garlic slowly and makes peeling the cloves afterwards a dream! They come out soft, roasted and creamy. The remaining garlic infused oil-water is added to the cloves that are then mashed with a fork and seasoned with additional olive oil (to the consistency you want), salt and pepper. 

Try it, you’ll like it. And it’s easy.

Happy eating, -s.


My baby got sauce
Your baby ain’t sweet like mine
She got sauce
Your baby ain’t sweet like mine
She got sauce...


Sorry, couldn’t resist a little G Love and Special Sauce reference here.

James is currently experience one heck of a bout of separation anxiety. Poor little guy; Chris and I need to carry him constantly or he screams. He screams and wails and flails his arms and doesn’t breathe for 5 seconds. It’s a pretty rough scene, but soon he won’t want us to hold him at all, so I try to empathize while I do everything with one hand, like cooking and buttoning a shirt and putting on make-up — you get the picture; so dinner prep needs to be minimal and all done with babe on hip. Hence, stir-fries.

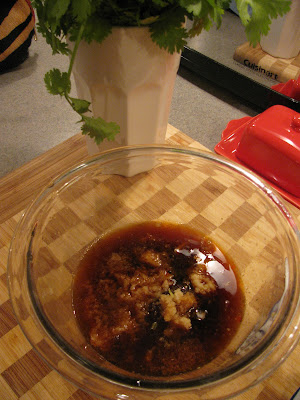
I have been working on and perfecting my go-to stir-fry sauce. We try to have some stir-fried greens (mustard, Chinese broccoli, kale, arugula, spinach) and a lean protein with brown rice (or my favorite pure-white, no-whole-grain-here jasmine rice) once a week. This is in no way authentic, but it is complex, crowd-pleasing and pantry-friendly.

 
Sarah’s oh-so-special sauce
enough for one stir-fry that serves 4 hungry bambini or adults

Ingredients
2 tablespoons tamari or low-sodium soy sauce
1 tablespoon fish sauce
2 tablespoons water
1 tablespoon raw sugar or brown sugar
½ a lime, juiced
½ tablespoon roasted red chile paste
2 cloves garlic, grated on a microplane
1 thumb-sized knob of ginger, grated on microplane
½ teaspoon cornstarch (optional)

Directions
Combine all of the ingredients in a bowl, whisk to break down sugar and chile paste.

Pour onto stir-fry ingredients once they are browned and fully cooked. Cook for 1 minute, until slightly thickened and glossy.  Serve hot.

Happy eating, -s.
Our little family's favorite lunch spot is Pizza Brutta. Pickle will eat an entire pizza Margarita (minus the crust, which is my favorite part, so it works). He loves watching them assemble the pizza, place it in the 700+ degree wood-fired oven and cut it and serve it to us ("here it comes, momma!").

So, it was only natural that I try to re-create a version of their pizza Margarita at home -- minus the stunning wood-burning oven. Okay, I admit the crust is so not the same, but the essence is true and Pickle loves it just as much.  

It's simple as can be to make, especially if you have the dough for the crust already made. Peter Reinhart's recipe is impeccable -- a must try. I typically free-form this on an aluminum baking sheet.

This is a great, after-work pizza, since there is little to prep. Walk in the door and, before you even take your coat off, preheat your oven to 500 degrees F.  Pour a glass of wine, put on some music and start making the pizza! I serve this with an apple-celery salad with raisins and toasted almonds. More on that another time.

Pizza Margarita
serves 4 adults or 1 hungry bambino

Ingredients
1 large ball of pizza dough
2 cups shredded, whole-milk mozzarella
28 oz. can of San Marzano tomatoes, drained
1 small clove of garlic, sliced
1/8 teaspoon dried oregano
1 teaspoon kosher salt
freshly ground black pepper to taste
2 tablespoons olive oil
6-8 fresh basil leaves,torn into large pieces.

Directions
Preheat oven to 500 degrees F. Place a rack on the lowest level of the oven.

On a floured surface, roll or press out dough to the desired size -- about 14-inches round or a 11 x 14 inch rectangle. Place on your baking sheet.

In the bowl of a food processor or blender, add the tomatoes, garlic, oregano, salt, pepper and olive oil. Process until the sauce it smooth and voluminous. Take for seasoning and adjust as needed. This sauce is enough for two pizzas, so stash one part in the freezer for next time.

When the oven is good and hot, sprinkle with cheese, uniformly covering the surface. Place in the oven and bake for 10 minutes, or until the cheese is browned and bubbly.

Take the pizza out of the oven and spread the sauce all over the cheese, covering completely. Place back in the oven for 2-3 minutes. Remove from oven and let cool for a couple of minutes before cutting into pieces. Scatter with basil leaves. Serve while piping hot.

Happy eating, -s

I will never complain about the heat while living in Wisconsin. Our summers are so short in comparison to our winters, that I will take the heat, the humidity, the severe weather and the bugs. But, I must say, this week is going to be hot; damn hot. Every day, all-day, 90+ degrees hot. The perfect remedy is my refreshing watermelon-lime slushy.

My younger brother and his wife were in town last week and Chris did the grocery shopping, as he was barbequing a 9-lb pork shoulder for the occassion. Back from Costco (where we typically don't get food items besides cooking olive oil and nuts), came a 3-pound container of sour cream (holy s%#$) and a huge-ass watermelon.

I'm still working my way through the sour cream (I tackled a sour-cream coffee cake for Sunday morning breakfast; I may be churning some sour cream ice cream to top a raspberry crisp ... or maybe some corn muffins with green onions and sour cream to accompany barbequed chicken ... any other ideas are welcomed!).

With the huge-ass watermelon, besides slices accompanying every meal, I've been whipping up watermelon slushies, which are in no way related to the artifically flavored/dyed 7-11 slushy. These are the essense of watermelon, with a kick of lime zest and juice. The perfect remedy to a hot day. Adults can add a jigger or two of rum or vodka, if they must.

Watermelon-Lime Slushies
serves 4 thirsty bambinos or adults

Ingredients
2-3 large wedges of watermelon, rinds removed
1/2 cup cold water or limeade, if you have it.
juice and zest of two limes
1 tablespoon sugar
2 cups ice

Directions
In a blender, add the water and watermelon wedges. Blend until foamy, pink and smooth. Add lime juice, zest and sugar and blend until incorporated, about 30 seconds. Taste and adjust seasoning, adding more watermelon, lime juice/zest. I wouldn't add anymore sugar, but that's just me.

Add the ice and blitz until smooth and slushy.
Drink quickly with requisite straws.

At the Market
sugar snap peas
green beans
Dreamfarm goat cheese
baby zucchini
rainbow swiss chard
golden beets with greens
Italian paste tomatoes
carrots
red onions

Menu: week of 16 July 2011
Saturday: Key West shrimp salad sandwiches with green beans vinaigrette
Sunday: crunchy tacos with refried beans, sauteed beet greens and fresh goat cheese
Monday: sauteed baby zucchini and Italian sausage with oriecchiette and opal basil
Tuesday: pork and green bean stir-fry with cashews and steamed jasmine rice
Wednesday: chicken cutlets Milanese with oven-roasted paste tomatoes
Thursday: ricotta frittata with swiss chard and red onions
Friday: carryout
Happy eating, -s.
Our Christmas dinner was German-themed: roasted pork, potato dumplings, pickled vegetable salad and braised cabbage and apples – a pretty amazing meal that was kicked off with an afternoon noshing of flammkuchen that my sister Holley made. Flammkuchen is the German equivalent of pizza that is topped with quark or crème fraiçhe, onions and bacon/speck (see photo above of ours from Christmas). The crust is more cracker-like than chewy pizza crust – mainly due to the miniscule amount of yeast in the dough. It reminded me a lot of a lighter version of Suzanne Goin’s bacon and young onion tart with cantal cheese from her cookbook, Sunday Suppers at Lucques, of which I make a “lighter” version with just sautéed onions and the ricotta-crème fraiçhe base that tops flaky puff pastry.

In cooking, as in life, there are perfect pairs; onion and bacon are one of them. There is nothing better than sautéing onions in bacon fat to start a pot of clam chowder. Spaghetti carbonara and bucatini all’amatriciana are both sublime with the silky onions and pancetta that make up the base of their sauces; one creamy and unctuous; the other piquant. Onion and bacon can play multiple roles in the kitchen, as a flavor base, as the star of the show, or as a side note in a steaming bowl of pasta – a perfect pair indeed.

Here’s a link to a yummy recipe of flammkuchen from the very yummy blog, Delicious Days.

Up next: pork three ways: braised pork with polenta, shredded pork and avocado tacos and fragrant pork with jasmine rice and julienned cucumber.
Happy eating, -s.
Happy Holidays! Pickle's school is closed for the week, so he and I are hanging out at home. It's been a blast so far and we're only on Day Two. Here's what our days have consisted of:

1. Wake up and watch Little Bear; have juice and fish oil pills/tangerine-flavored chewables for P.
2. Eat steel-cut oats and dehydrated apples with a little maple syrup for sweetness.
3. Play with all of Pickle's new toys, while still in pajamas - heaven.
4. Have a snack (steamed edamame, seeded crackers, clementines, etc.)
5. Head outside: go on snow walks, shovel, sled in our back yard (we have a mini hill), make snow angels, follow bunny tracks.
6. Inside for lunch (soup, grilled cheese and avocado sandwiches, etc.)
7. Nap time: for me and Pickle yesterday; again, heaven.
8. Post-nap snack and more playing.
9. Make dinner (see recipe below) and dance.
10. I love vacation

I made a pledge to myself that I would cook out of my cookbooks more this year instead of constantly printing out recipes online. I'll share them with you as I proceed. I'm highlighting Alice Water's lovely cookbook, The Art of Simple Food. Last night's meal was spicy cauliflower soup from page 257 of this lovely tome. I changed only two things: I used orange cauliflower and I pureed it a bit more than what she called for as Pickle likes silky-smooth soups. Try it - it's warm, hearty and good for you, too!

Spicy Cauliflower Soup
modified from The Art of Simple Food by Alice Waters
serves 4-6 hungry mamas, dadas and bambinos

Ingredients
1/4 cup olive oil
1 onion, diced
1 carrot, scrubbed clean, ends trimmed and diced
1 teaspoon coriander seeds, crushed
1 teaspoon cumin seeds, crushed
1 teaspoon chile powder
1/4 teaspoon dried chile flakes
salt ( I used about 2 teaspoons total)
freshly ground black pepper
6 cilantro sprigs, roughly chopped
1 large head of cauliflower, stemmed and coarsely chopped (about 6 cups)
3 cups low-sodium chicken broth
3 cups water

accompaniments
yogurt
chopped cilantro
wedges of lime

Directions
Heat a heavy-bottomed pot over medium heat. Add olive oil. Once oil is hot, add onion, carrot, spices and salt & pepper. Cook and stir often until softened but not browned. Stir in cilantro, cauliflower, broth and water.

Raise heat to high and bring to a boil; stir occassionally. Once a boil is reached, reduced heat to a simmer and cook until the cauliflower is very tender, 20 to 30 minutes. At this point, either puree with an immersion blender or use a stiff whisk to coursely puree the soup. If overly thick, add a little hot stock to thin until the desired consistency is achieved. Taste and adjust seasoning if necessary. Serve hot with a dollop of yogurt, a sprinkling of cilantro and a squeeze of lime.

Here's what we're eating this week...

Menu: week of 27 December 2010
Monday: spicy cauliflower soup
Tuesday: mushroom ragout with pappardelle
Wednesday: braised pork shoulder with polenta
Thursday: black-bean soup served with crusty bread
Friday: shredded pork tacos with avocado and black refried beans
Saturday: Happy New Year! lasagne bianca with homemade pasta served with a fennel-apple salad
Sunday: sauteed broccoli rabe on ricotta bruschetta

Happy eating, -s.
Ratatouille — I love this word. It's a fun one to say and a treat to eat. My version simplifies matters by roasting the vegetables instead of sautéing each separately in a sauté pan. After a caramelizing roast in the oven, the veggies get doused in some good olive oil and a squeeze of lemon. Besides being an ideal side dish to almost anything, it makes a mean grilled cheese sandwich filling, as well as a superb pasta sauce. Goat cheese is its friend, too — slather it on some crostini and top with some ratatouille; the perfect late summer starter.

Oven-Roasted Ratatouille
make 6-8 side servings

Ingredients
1 large globe eggplant or 4 Asian eggplants, chopped into 2-inch pieces
2 red bell or heirloom peppers, chopped into 2-inch pieces
2 green zucchini, quartered and sliced into large chunks
2 red onions, quartered and then sliced into large chunks
2 teaspoons herbes de Provence
2 large cloves of garlic, minced finely
¼ cup olive oil
2 teaspoons kosher salt
1 teaspoon freshly ground black pepper
½ lemon
Extra virgin olive oil (optional)

Directions
Preheat oven to 400 degrees. Line a rimmed baking sheet with foil. In a bowl, toss each vegetable separately with ½ teaspoon of herbes de Provence, some garlic, 1 tablespoon olive oil and a large pinch of kosher salt and a few grinds of pepper. Place it on the sheet pan in one layer; continue with the remaining vegetables in the same manner.

Roast for 45 minutes to 1 hour, until soft and caramelized. Toss everything together in a larger serving bowl and add the lemon and olive oil. Serve hot or a room temperature.

At the market:
corn
Dreamfarm eggs
eggplant: globe and Japanese
ginger gold apples
green beans
heirloom sweet red peppers
kale
mint
red and yellow onions
tomatoes: slicers and mixed cherry
yukon gold potatoes
zucchini

Menu: week of 5 September 2010
Sunday: fried chicken and gravy with buttermilk biscuits and steamed green beans
Monday: BLT pizza
Tuesday: ricotta frittata with ratatouille
Wednesday: Corn and potato chowder
Thursday: Sauteed kale with fresh ricotta bruschetta
Friday: Tomato sandwiches with black-bean and edamame salad

Happy eating, -s.
I’ve have slowly come to the realization that there are two parties in this world: beet lovers and beet haters (no political affiliations here!). I am head-over-heels, a beet lover. Thankfully, Chris is too. Pickle is still on the fence. The beet haters, as I’ve come to learn, think that they taste like dirt. This is understandable, since that’s where they grow, but their earthiness is so nicely paired with their inherent sweetness — especially when roasted — that I can't understand the anti-beet sentiment. Anyway, this recipe is for the LOVAHs out there who can get enough beets!

The inspiration for this dish was that fact that I had a heck of a lot of beets in the fridge and needed to do something with them — new. I had been counting the days for tomato season to begin, so naturally I had panzanella on the brain. With some day-old bread on the counter and a bevy of basil from our CSA, I thought, “beet panzanella.” I’m sure someone else has made this before me, but I seriously thought I had a moment of brilliance, especially since I was utilizing a whole slew of ingredients from my overflowing icebox.

I roasted the beets the night before, so they were ready to go. While I baked the croutons in the oven, I prepped all the other ingredients, first by making the vinaigrette. Here’s one thing I learned in making this: a tomato-based panzanella is juicier, so you’ll need more dressing for the beet version. When the vinaigrette hits the tomatoes, they start releasing their own juices and this gets mixed into the salad and good things start to happen. Beets don’t have a lot going on in the juice department (poor beets), so you’ll need to compensate for that in a little more vinaigrette, but still go slow in adding it to the salad because there is nothing worse than an overdressed, gloppy salad.

With that, get roasting and chopping and mixing and dicing your way to beet happiness.

p.s. as you can see in the photo below, a fortunate or unfortunate side effect is the fantastic Technicolor-pink hue the entire salad takes on the minute the dressing hits the beets.

Beet Panzanella
Serves 4 hungry adults as a starter or 2-3 for a main course

Ingredients
6 medium-sized mixed beets (ruby, golden and Chioggia), roasted – I used the Marc Bittman version from How to Cook Everything since it’s super easy.
½ a red onion sliced very thinly into half moons
1 cucumber, seeded and diced
A large bunch of basil, roughly torn into pieces
½ loaf of day-old bread cut into 1-inch cubes
Olive oil
Kosher salt and pepper

For the vinaigrette:
1 teaspoon Dijon mustard
3 teaspoons red wine vinegar
½ teaspoon salt
¼ teaspoon freshly ground black pepper (about 8 turns on the peppermill)
1/3 cup extra virgin olive oil

Directions
Preheat the oven to 400 degrees. Line a rimmed baking sheet with foil. On the baking sheet toss the bread cubes with a few glugs of olive oil, a large pinch or two of salt and a few grinds of pepper. Toss well and bake until the croutons are toasty browns and crisp all over – about 15 minutes.

While the croutons are baking, make the vinaigrette. In a medium-size bowl, whisk together the mustard, vinegar, salt and pepper until incorporated. While whisking, slowly pout the olive oil into the mustard-vinegar mixture until emulsified. Set aside.

Remove the blackened skin from the beet, trim the ends and cut into 1-inch pieces. Add them, along with the onions, cucumber, beets and basil to a large serving bowl.

The croutons should be done by now; remove from oven and let cool for a few minutes. Add to the salad and toss with hands to evenly distribute everything. Add the vinaigrette. Taste and adjust for seasoning. Eat within the hour or the croutons start to lose their crispness.

Happy eating, -s.
Sorry, I’ve been MIA recently. With summer getaways and visitors, I’ve lost track of things. Let me catch you up!

A couple of weekends ago, I went on a little mother-daughters’ weekend with my two sisters and my mom. I’ve never been away from Pickle for more than a day, so this was a big trip for me. Granted, he was with Chris, but still, I felt like I was constantly forgetting something (or someone)!

Anyway, we spent a very relaxing few days on beautiful Elkhart Lake drinking lots of rosé and eating delicious food. I’ll have a recipe for apricot-ricotta tartines for your once I get the photos from my sis (hint, hint :).

We also had a pretty exquisite meal at the Paddock Club, whose head chef spent time in the Bartolotta kitchens in Milwaukee, as well as a personal favorite, Lombardino’s in Madison. We shared many small plates, but the one dish we ordered seconds of was the grilled broccoli with red pepper rouille. It was really special and cooked to perfection, as well as a great inspiration for what to do at home on your own grill, with our without the sauce. Served simply dressed with a little olive oil and a squeeze of grilled lemon, it would be divine as a starter or side.

Grilled Broccoli
If you don’t have a grill, high-heat (425 degrees) roasting the broccoli would give you a similar effect to gas-grilling it, but you can't replicate the perfect charring of charcoal grill. Still worth a try, though!

Ingredients
1 lb grilled broccoli, cut into large florets
Kosher salt
Freshly ground black pepper
2-3 tablespoons olive oil, plus more for serving
½ of a lemon (optional)

Directions
Bring a large pot of water to a boil. Has a large bowl of ice water ready. Heavily salt the water and then carefully submerge the broccoli in the water; boil rapidly for 1-2 minutes and then removed to the ice bath. Once cool, drain very well. Toss with a few tablespoons of olive oil, as well as a good pinch or two of salt and lots of pepper.

When your grill is hot, place the broccoli on the grate and grill until nicely charred on one side – a minute or so; flip to the other side and do the same. Grill some halved lemons at the same time, if you have them.

Remove to a platter. Drizzle with a little more olive oil and a squeeze of the lemon. Serve immediately.

p.s. My sister Holley and my mom made this broccoli to put on a pizza with a roasted garlic sauce and mozzarella cheese; I must say that is a good idea and a definite must-try.

In the CSA box:
Broccoli
Carrots
Cucumbers
Fresh Garlic
Garlic Chives
Green Beans
Green Zucchini
Napa Cabbage
New Red Potatoes
Patty Pan Squash
Rainbow Chard
Red Iceberg Lettuce
Red Mustard
Bonus: Basil

Menu: week of 17 July 2010
Saturday Lunch:
open-faced sandwiches with garlicky sautéed zucchini and patty pans topped with melted Edelweiss Dairy two-year cheddar
Sunday: Iceberg wedges with homemade garlic-chive and Hook’s blue cheese dressing, served with a whole wheat baguette
Monday: roasted red new potatoes with a tahini-Greek yogurt sauce and a side of quick-sautéed green beans.
Tuesday: Swiss chard pizza
Wednesday: Concerts on the Square
Thursday: sautéed red mustard on fresh ricotta bruschetta
Friday: Cilantro-almond chicken tacos with shredded Napa cabbage

Lunches throughout the week: shredded carrot salad with whole-grain pita
To-do: pickle some cucumbers!

Happy eating, -s.
The market was really showing off this Saturday – the baby beets were becoming adolescents; the broccoli was burgeoning; strawberries adorned almost every table and the varieties of lettuce available knew no bounds. Besides tomato season (and maybe corn), this is my favorite time at the market. Everything is so fresh and crisp. Pickle was really digging the raw sugar snap peas and he munched on these until we bought our strawberries … then it was no-holds-bar with those sugary sweet treats. His mouth and chin were stained pink from the juice, but he was in bliss, asking for more every few feet.

Our dinner group is heading outdoors this month for a little evening picnic under the stars. My friend Katie has been brainstorming what to cook on her camping grill – besides her famous blue-cheese burgers (which are divine) and asked me if I had any ideas. It got me thinking about party friendly grilled foods – ones that are full-flavored, prep-ahead dishes that don’t require the cook to be manning the grill all night (which is never fun).

Here’s my top-five list of quick-grilling entrees.
p.s. successful grilling really comes down to two things: a clean grill (grate oiled if you’re doing fish) and a really hot fire. Don’t attempt these without those two.

Fish kabobs and cherry-tomato kabobs — kabobs are great for fish, since you don’t have to worry about the fish falling apart on the grill when you try to lift it.

Use this “marinade” for both the fish and the tomatoes — honestly, this is my go-to marinade for almost everything; I just modify it as needed with different herbs or spices:
¼ cup olive oil
2 cloves of garlic, grated on a microplane grater or minced by hand
2 teaspoons of minced fresh marjoram or oregano (if you have to use dried herbs, use marjoram) ½ a lemon, juiced
1 teaspoon salt
½-teaspoon freshly ground black pepper
1 pound firm-fleshed fish, cut into 1-inch cubes – Check out Monterey Bay Aquarium’s website for a list of sustainable fish for your geographic region: http://www.montereybayaquarium.org/cr/cr_seafoodwatch/download.aspx
1 pint cherry or grape tomatoes wash and de-stemmed

Mix marinade ingredients together in a bowl and then divide it between two bowls — one for the fish and one for the tomatoes. Toss to coat and then place on metal skewers (don't mix the two). Grill over a hot fire, for roughly 5-7 minutes total, turning once. Serve with grilled bread and wedges of lemon.

Skirt steak with chimichurri – just a sprinkle of kosher salt and black pepper on the steak, grilled for 2-3 minutes per side depending of the thickness, a good rest on the cutting board and a side of chimichurri are all you need for this ultra-flavorful meat. I’ve linked to a very traditional recipe, but I have made chimichurri with mint, cilantro, and basil. Use what you have and what’s in season.

Shrimp — Well, very sadly gulf shrimp is pretty much out of the question, but shrimp can take a good lashing of heat and spice and are super-fast cooking. Use the fish “marinade” above, replacing the marjoram with 1 teaspoon red chile flakes and 1 teaspoon smoked Spanish paprika. Skewer them, allowing space in between each shrimp; they should take 3-4 minutes total to cook over hot coals. You don’t want to overcook them or they turn to rubber. Lemon wedges are a must.

Grilled halloumi and zucchini — this vegetarian dish is also a great starter. Halloumi is a firm cheese, usually made from sheep or goat’s milk that can withstand the heat of a grill. Again, use the marinade above for the zucchini. Just halve the zucchini, coat with the marinade and place on the grill — 2-3 minutes per side. Figure ½ a halloumi per person and one whole zucchini. Serve with grilled flatbread and grilled lemons and a little sambal chile sauce for adventurous eaters. I grill the halloumi whole (for about 5 minutes one side and 1-2 on the other) and then slice into ½-inch slices.

Burgers — I know, so obvious, but so gosh-darn good that it had to be include. Burgers really are the essence of summer on a plate. I use grass-fed ground chuck — that’s it. You can shape the burgers well in advance and keep them cold in the fridge, salt and pepper them just before grilling and serve with your favorite garnishes and condiments. I love mayo and ketchup mixed together, some lettuce, a slice of white onion and a slice of tomato (when in season), place it on a toasted brioche bun with sesame seeds and I am a happy girl.

At the market:
Baby carrots
Beets
Butter Pecan Ice cream from Sassy Cow Creamery
Broccoli
Dried Horto beans
Eggs from dreamfarm
Potatoes
Rhubarb
Russian kale
Sassy Cow Organic Whole Milk
Strawberries
Sugar snap peas

Menu: week of 13 June 2010
Saturday:
homemade rosemary foccacia with local blue cheese and honey, served with cured meats, strawberries and sugar snap peas
Sunday: Birthday BBQ; snack of escabeche-style pickled baby carrots and tortilla chips and a cold IPA
Monday: chilaquiles with sautéed beet greens and dreamfarm eggs
Tuesday: Sautéed Russian kale on fresh ricotta bruschetta
Wednesday: potato and locally made Mexican chorizo tacos served with white onion, cilantro, avocado and limes
Thursday: beef and broccoli stir-fry with jasmine rice
Friday: roasted beet and goat cheese pizza

Happy eating, -s.
Pickle eating a raw crimini mushroom!?

I don't know if all two-year-olds are like Pickle, but man, does this kid eat a lot. He will have his 'first' breakfast shortly after he wakes (right now it is flax-seed oatmeal with rhubarb-raspberry compote on top). Chris and I will then have breakfast a little later – cereal, oatmeal, wholegrain toast with almond butter and jam, you get the picture. Well, Pickle will want to sit on our laps and proceed to eat half of whatever we're eating (and I usually have to fight to eat the other half!), hence his 'second breakfast.' Then, maybe a half-hour later he's onto his 'third breakfast' where he might have a banana, or some dry cereal in a cup, or a half-slice of banana bread.

Now, you might be thinking, "Why don't you feed him that stuff all at once?" Well, honestly, I don't think he would sit through that 3- to 4-course meal in one go, being two and all. And I would be hungry too, if I did as much physical activity as he does in the morning. Seriously, the kid has boundless energy!

Anyway, I am struggling to get out of this carbo-overloaded morning, but I also don't want to be frying up eggs every morning. Here's my solution: bread pudding. Take some leftover bread, egg, milk, some sautéed veg and maybe some meat (leftover shredded pork or chicken, ham, prosciutto, etc.) and you have a one-dish meal that can be easily reheated in portion sizes all week long in the toaster or regular oven.

Master recipe for savory bread pudding
Serves 5-6 hungry bambinos

Ingredients
half of a loaf of day-old* hearty, crusty bread, cut into 1-inch pieces
½-pound of your pick of vegetables: thinly sliced mushrooms, asparagus cut into 1-inch pieces, cherry/grape tomatoes (halved), spinach, arugula, broccoli florets, peas, etc.
1 large garlic clove, minced
¾ cup finely chopped onion – about one medium onion
2 tablespoons unsalted butter
2 tablespoons olive oil

3 large eggs
1 cup whole milk
1 teaspoons salt
½ teaspoon ground black pepper
4 teaspoons chopped fresh herbs – thyme, parsley and basil are my go-to picks

1 cup grated or crumbled cheese
½ cup pre-cooked meat, cut or shredded into bite-size pieces (optional)

Directions
In a large sauté pan, heat butter and olive oil over medium-high heat. Add onion and cook until soft and translucent. Add garlic and cook 30 seconds. Add your choice of vegetable and cook until crisp-tender (or wilted in case of greens). Do NOT overcook. Set aside to cool.

Whisk eggs, milk, salt, pepper and herbs in large bowl. Mix cheese and optional meat in medium bowl. Place half of bread in a large, rectangle ceramic or glass baking dish. Sprinkle with half of sautéed vegetable, then half of cheese mixture. Pour half of egg mixture over. Repeat with remaining bread, vegetables, cheese mixture, and egg mixture.

While your oven preheats to 375-degrees, let stand 20 minutes, pressing with a spatula to submerge bread pieces. Bake bread pudding until brown and puffed, about 45 minutes. Cool 10 minutes.

You can eat this right away or save it for breakfasts throughout the week. Once cooled to room temperature, cut into roughly 3x2-inch rectangles, wrap in waxed paper and place into large Ziploc bags. Refrigerate until ready to eat. Reheat in a 350-degree oven or toaster oven until warmed through.

Some delicious combinations to try throughout the summer:
Mushrooms, parsley, cooked and crumbled Italian sausage, parmigiano
Grape, cherry or Juliette tomato, basil, prosciutto (optional), Parmigiano or goat cheese
Zucchini/summer squash, thyme, aged Gouda
Peas, thyme, bacon, goat cheese
Broccoli, thyme, roasted chicken and gruyere
sweet bell peppers, basil, dry salami, pecorino romano
Eggplant, thyme and feta

*if your bread is not stale, place the cubed bread on a large baking sheet and let stand uncovered overnight to dry out.

Happy eating, -s.